Start from Nov. 10th / 11th.
Due on Nov 29th/ 30th.
......
Wednesday, November 10, 2010
Sunday, November 7, 2010
Week 11 - Visual Journal
Class One
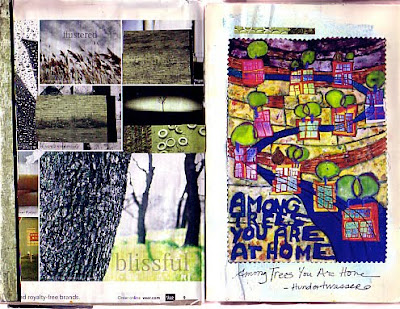
VISUAL JOURNALING
"Visual journaling is a creative way to express
and record life's experiences, feelings, emotional
reactions, or our inner world - visually and verbally.
Essentially, visual journaling can become a potential
key to the artmaking process.
Exploring our own thought process through visual
journaling is essential in a world that is in a state of
continuous change. Just as there are many ways to
express oneself artistically, there are many ways to
create visual journals. By committing to the visual
journaling process, one can learn how to access his/her
inner language of imagery and express it both visually
and verbally, while exploring the connection between
image and word. Through visual journaling one can
also become capable of articulating connections
between their own personal art-making experiences
and the works of master and contemporary artists."
Here are some examples.


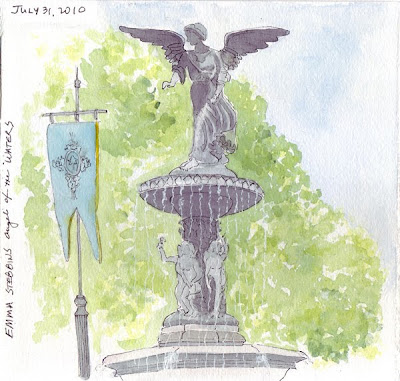
Now, you status is a "Young Architecture Student". What are the characteristics as being so?
Keep five visual journals. It is due the next Monday.
Requirements:
1. It should be developed mainly based on drawing (with color) and writing. You could also do magzine clipping, etc. Be creative.
2. Reflect your current understandings about architecture, but not just about architecture. You need to really develop your inner thoughts and record subtle things.
3. Use 9x12 sketch pad.
Wednesday, November 3, 2010
Week 10 - Theories of Colors
Do not let you drawing look CHEAP! (What does it mean? - Right! The Details!)
Homework 1:
Draw one small object, using six color harmony schemes.
a. Completementary color harmony,
b. Analogous color harmony,
c. Warm color harmony,
d. Cool color harmony,
e. Split complementary or Triadic color harmony,
f. Rectangle color harmony.

Homework 2:
Draw to copy this sketch. 14x17 paper.

Sunday, October 31, 2010
Week 10 - Theories of Colors
Class 1 - Basic Theories
You could review the theories that we learned today in class here:
http://www.youtube.com/watch?v=59QGexKdFUI&feature=related
 Create color wheel in Photoshop.
http://homepage.ntlworld.com/tim.ross/ColourWheel/index.html
You could review the theories that we learned today in class here:
http://www.youtube.com/watch?v=59QGexKdFUI&feature=related
 Create color wheel in Photoshop.
http://homepage.ntlworld.com/tim.ross/ColourWheel/index.html
Homework 1:
1. Reshade/refine your masks design from the last weekend homework. And see if you have used some color schemes that we learned today.
Requirements:
a. Shade/color with color pencil very thick and even. Make sure you can not see the white paper anywhere within your mask border box, except the white areas that you leave on purpose.
a. Shade/color with color pencil very thick and even. Make sure you can not see the white paper anywhere within your mask border box, except the white areas that you leave on purpose.
b. See on textbook page 87 those little circles under the drawings, and please indicate the color scheme that you used in mask design. One scheme for one mask, and if you used more than four colors, just indicate from the dominant three or four colors. DO NOT draw the circles with free-hand, it will not look good. Write the names of the color scheme beside the circles using HB pencil.
Homework 2
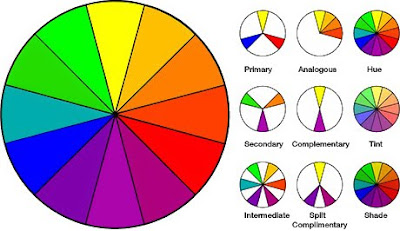
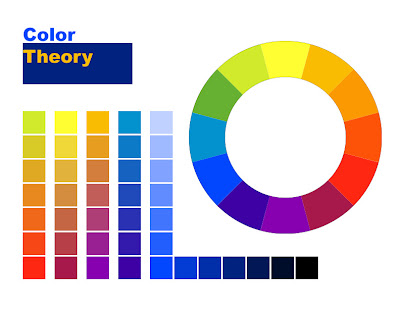
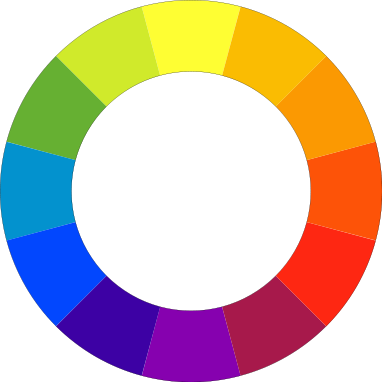
Create a color theory graph in Adobe Illustrator like the example below. (You can use computer lab. It's gonna take about 1.5 to 2 hours. So manage you time.)
Requirements:
a. Watch these tutorial videos first to before you get started.
b. Do not be afraid of exploring a new computer program. If you have any question, try to google it and find out the anwser by yourself. For example, what is "live trace". And notice that the videos were made in Mac, so you should notice the different on PC.
c. Set the new file on 8.5x11 paper size. When you are done, print it out and bring to class.
d. This is the color wheel that you may need to use.
Homework 4:
In the next class, we will do more practice about color scheme and detailed drawing (micro study). Here's an example.
 Please see more examples on textbook page 78, 84 and 85. We will use monochromatic, complementary, analogous, cool/warm color, triadic and rectangular color harmonies to draw small scale objects. So get an object ready, fruit, vegetable, daily life stuff, and bring it to class.
Thursday, October 28, 2010
Week 9 - Producing complete drawing
Class 2 - Try to use color!
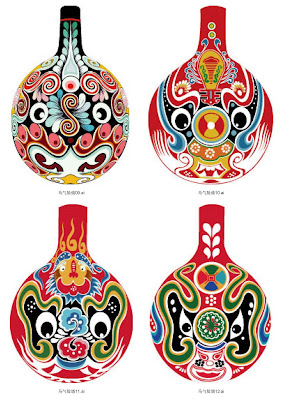
Homework 1 - Mask Design.
Requirements:
a. Design four masks. It's all about your design: layout on the paper, face shape, pattern for masks, colors, etc.
b. Use 3 to 6 kinds of colors in each one (I suggest you to use 4 to 5).
c. Give each mask it's life, i.e. characteristic, emotion, facial expression and even a gender.
d. Each mask should have a background (you decide the size and shape of the background) shaded by a color that has been used in another mask.
e. Use the 14x17" sketchbook and color pencils.
These are some examples. You are supposed to design as detailed as them.


Homework 3 - pencil sketch


Homework 1 - Mask Design.
Requirements:
a. Design four masks. It's all about your design: layout on the paper, face shape, pattern for masks, colors, etc.
b. Use 3 to 6 kinds of colors in each one (I suggest you to use 4 to 5).
c. Give each mask it's life, i.e. characteristic, emotion, facial expression and even a gender.
d. Each mask should have a background (you decide the size and shape of the background) shaded by a color that has been used in another mask.
e. Use the 14x17" sketchbook and color pencils.
These are some examples. You are supposed to design as detailed as them.


Homework 2 - try your color pencils (standard color pencil vs. watercolor pencils.)
Requirements:
a. devide your paper into two portions vertically - one column for watercolor pencil, and the other column for standard color pencils (wax-based color pencils). You decide how wide are the columns.
b. For each color of watercolor pencil, shade the area in dry first. And then, use the thin brush from our tool box, wet the tip with water, and melt a little bit of the dry area that you just shaded, drag your brush to shade the rest of the area of that color. Then clean the brush. In this step, you'd better have another paper at hand for trial.
c. After you finish all the twelve colors from water color pencil, the the other column with standard color pencils. Pick the closest color to each color from watercolor pencil areas, match and line them up horizontally.
d. Follow textbook page 50 to write texts: major titles - watercolor pencils/ standard color pencils, minor titles - the names of all the colors (the names for the close colors on one line may be different.) Write with 0.2 pen.
e. Use 12x9 inch sketchbook. Control water amount on the brush, don't let it drop! Make sure everything looks clean and nice.
This is a reference example. Please notice now the colors are gradually changing (color relatives are together, right? )

Homework 3 - pencil sketch
Requirements:
1. Pick one drawing to do. If you choose the last one, it's due on the second class of the next week. Other choices are due in the first class, together with the other two homework items.
2. 14x17 sketch paper, pencil, border lines.


Wednesday, October 20, 2010
Week 8 - Producing complete drawing
Class 2 - Visual Harmony
All homework is due at 10:30 am on the second class of the next week.
Homework 1 - Choose one drawing from below to draw.
Requirements:
a. Use ink, pen, black marker and 14x17 sketchbook. (If you want to, you can bring the picture that you choose to draw to photoshop, set a new file as the same size as your drawing paper, and copy the picture to the new file and "Ctrl+T" to adjust the picture. Once you set up the exact size you want, you can print it out from 9th floor. And trace it.)
b. Side boarder lines are 1 inch far from the paper edges. Same distance from the top and bottom paper edges. That means ther drawing should be exactly at the center of the paper.
c. Keep your drawing very clean.

 Requirements:


All homework is due at 10:30 am on the second class of the next week.
Homework 1 - Choose one drawing from below to draw.
Requirements:
a. Use ink, pen, black marker and 14x17 sketchbook. (If you want to, you can bring the picture that you choose to draw to photoshop, set a new file as the same size as your drawing paper, and copy the picture to the new file and "Ctrl+T" to adjust the picture. Once you set up the exact size you want, you can print it out from 9th floor. And trace it.)
b. Side boarder lines are 1 inch far from the paper edges. Same distance from the top and bottom paper edges. That means ther drawing should be exactly at the center of the paper.
c. Keep your drawing very clean.


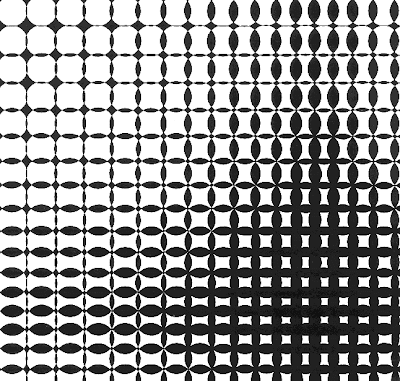
Homework 2 - Compose your own drawing with visual harmonial principles.
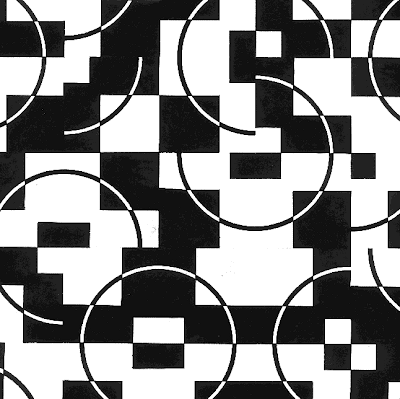
If we call the areas you shade as positive, then the areas that you leave blank are negative. Lines and dots are zero. Please see the example below, figure out how the positive and negative and zero work together.
 Requirements:
a. Use five kinds of object, one be from a plant, three be from our drawing tool box or your daily use stuff. But you can add some more stuff to produce particular visual pattern.
b. Use ink pen, black marker and 9x12 sketchbook.
c. Decide the hight and with propotion. Leave 0.5 inches from the sides.
d. Write major title as "VISUAL HARMONY", and list the viual harmony principles that you use following the minor title rule. See book Page 50.
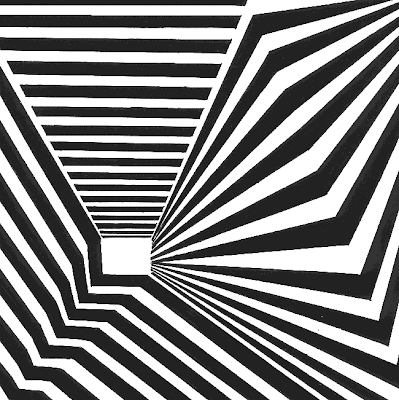
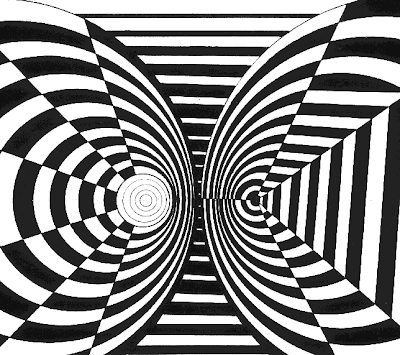
e. You are supposted to do it very creative in this graphic drawing composition practice. See the following examples.


Monday, October 18, 2010
Week 8 - Producing complete drawing
Class 1 - Producing complete drawings (1): Shading patterns.
Homework:
1. Get your grade-circled drawings ready!
Before next Monday, I will give out your mid-term grades. Please check both in blog and your eraider. Since this means half of the semester is almost done, it's time for us to look back what we have learned and show your good drawings to other people. We will have our own exhibition on 3rd floor!!!
Please go over your drawings and see the grades that I gave you. If I circled your grade, usually A+, A or A-, turn them in when next class (Wednesday or Thursday) starts. I will select again and pin up on 3rd floor!
2. Drawing 1- shading pattern: Textbook page 30, the lower half page on the left.
Requirements: boxes are 1.5x1.5 in and 1.5x2.0 in. Equal distances in between and on sides. 9x12 sketchbook. (If you didn't come to class today to get back you sketchbook, you can find it on the classroom bookshelf in Room 501, or couch in Room 306.) Use pen and ink, and remove all pencil lines at the end.
3. Drawing 2 - Textbook page 30, right half page.
Requirements: Do this drawing on 9x12 sketchbook. Use pen and ink and remove all pencil lines at the end.
4. Drawing 3 - shade your shoes from your last weekend's homework. (Please refer to the previouse homework.)
Requirements: Please see page 16 and 17 of the textbook. Now since you have practiced several shading techniques, try to shade the shoes drawing using these techniques. Show the texture (fabric, leather, rubber or plastic), dark or light color as well as light and shade. See if you can see the sense of three dimension from your drawing.
Pencil only. Shade on your previous paper 11x14".
Subscribe to:
Posts (Atom)